Gimbal and Controller
When I sold my DJI F450 with a DYS 3-axis SMART GoPro gimbal and decided to build a larger multicopter I didn't want to buy a new gimbal that would only be able to handle a GoPro, with a larger multicopter I wanted to be able to use larger cameras. After some googling I found the ARRIS Zhao Yun Pro gimbal, it would be able to handle both a GoPro and larger cameras like a Sony NEX5 or similar. But since I still didn't have all parts for my Tarot T810 and no Sony NEX5 I didn't really want to pay $720, the Arris also uses Alexmos32 controller and I had som much trouble calibrating my DYS with Alexmos I wasn't really keen on another gimbal with Alexmos. I was planning to buy a Phobotic Centerpiece controller, had read some information about it before it was released and it sounder fantastic with auto calibration and fantastic performance without problems like horizon drift. Then I found the GHT EZ Pro 3 axis gimbal, it really seems to be a nice construction and it's possible to buy it without a controller but it's still a lot of money. Finally I decided to go for a really cheap 3-axis gimbal.
Rctimer Black ASP 3 Axis Nex-GH5 Brushless Gimbal
The RC timer is a cheap gimbal with a construction that isn't optimal since the pitch axis is only attached on one side but I decided to buy it anyway since I would have something to start with, I got the gimbal with a Alexmos32 controller with two IMUs for $330. I had a Panasonic Lumix GX1 since before so I decided to use it for filming but I bought a Panasonic LUMIX G 20mm f/1.7 II ASPH. Lens to use instead of the stock lens. I assembled the Gimbal and stared configuring the Alexmos32 controller. Once again I had a lot of troubel with the calibration, followed all the guides but it was really hard to get it working, after a couple of hours of calibrating and testing I finally could do a hand held test outside.
I can say that I wasn't really to happy with the test, roll and pitch worked quite OK but YAW didn't work, there were a lot of shakes and the video would be unusable. Continued with more calibration and more tests and I got better results but none that I would be happy with so I decided to sell the Alexmos. That was my plan from the beginning since I wanted a Centerpiece controller but I was hoping to be able to use the Alexmos to start with and be able to wait with buying the Centerpiece until people had tested it for a while and the worst problems/bugs were solved.
STorM32 BGC
Then I found information about a new controller being developed by some guy in Germany... I started searching for more information about this controller and it seemed pretty nice, the German guy is OlliW at RCGroup forum and he is developing the controller as a hobby project and more information about it can be found here: http://www.olliw.eu/storm32bgc-wiki/Main_Page
I found a version 1.1 SMarT32 board at Ready to Fly Quads I paid $25 for a controller with 2 IMUs, it costs a little bit more now but it's still really cheap. I was really glad I found this controller since my Alexmos were sold and I staret finding information about people that had a lot of problems with the Centerpiece, horizon drift and other problems.
As soon as I received the STorM32 controller I mounted it on the gimbal, installed a firmware on the controller (the controller from RTFQ is delivered without firmware) and started configuring it. There is a really good thread about this controller at RCGroups forum OlliW posts all updates there and people can request new functions. OlliW has been really quick on developing the new functions and there has really happened a lot during the two months I've been following the thread.
One of the first things I did was to calibrate the IMUs, OllW wrote a good description on how to do the calibration and I did a video to show the calibration that is used on the WiKi
The cube I'm using for calibration is 3D printed and the drawings for it can be found in the thread on RCGroups. After the IMU calibration I followed the WiKi on how to configure the PIDs and after calibrating for 20-30 minutes I was ready for my first test.
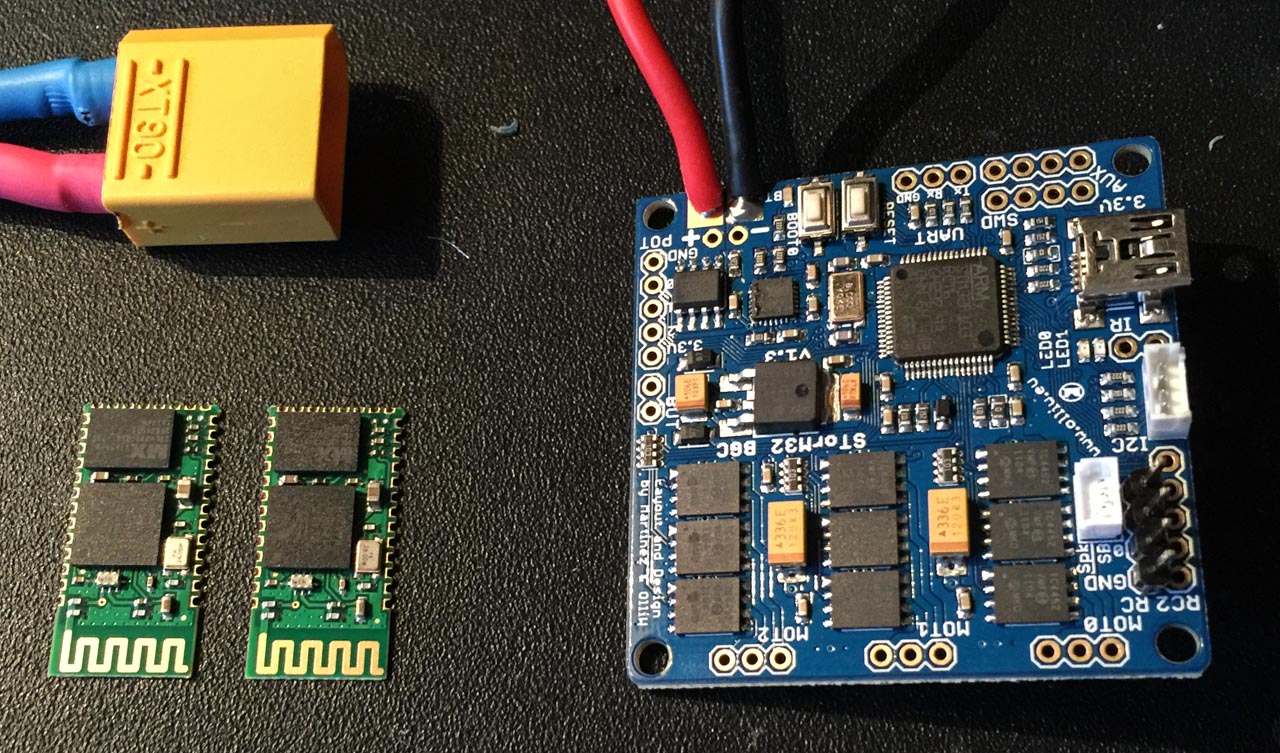
It really performed a lot better than the Alexmos32 and this just after 20-30 minutes of calibration. I've upgraded the firmware a couple of times since the test but have still not been able to do a flight test with the gimbal since my Tarot haven't been ready for flying but I hope to be able to test the gimbal the coming weekend. Today I also ordered a second STorM32 controller from RTFQ this time a version 1.3 and I've bought a couple of HC-06 Wireless Bluetooth TX so I'll be able to configure the controller via Bluetooth instead of connecting it via USB. There is also a guy developing a Iphone/Android app for configuration and controll of the BGC hopefully he will be able to release it.
First flight with the gimbal
I've have finally had time to do a test flight with the gimbal, I've calibrated it insode where it's 20°C and today it was 1°C outside, first time I booted the gimbal I could here thet there were a lot of small vibrations after the startup procedure but then I touched the camera by hand the vibrations stopped. Didn't have any computer with me anyway so I wouldn't be able to change any settings, so here is the 1st test flight.
The camera I'm using is a Panasonic Lumix GX1, haven't been using this camera to much before so I messed up with the auto focus, sorry for that. There is quite a lot of Jello effect in the video and that is caused bu the small vibrations in the gimbal and not from the propellers, this can be clearly seen after landing when I have turned off the motors. I also need to stiffen up the gimbal damping a little, will try to stuff the damping rubber balls with earplugs to see if it helps. More to come...
Added bluetooth connection
The STorM32 BGC is prepared for bluetooth connection, there are soldering points prepared so a HC06 module can be soldered to the board. The HC06 board I bought was mounted on a backplate so it didn't fit to the back side of STorM32, I know people have desoldered the module from it's backplane but I didn't want to do it so I connected it with cables instead. There is space on the gimbal to put the HC06 module so this solution works for me.
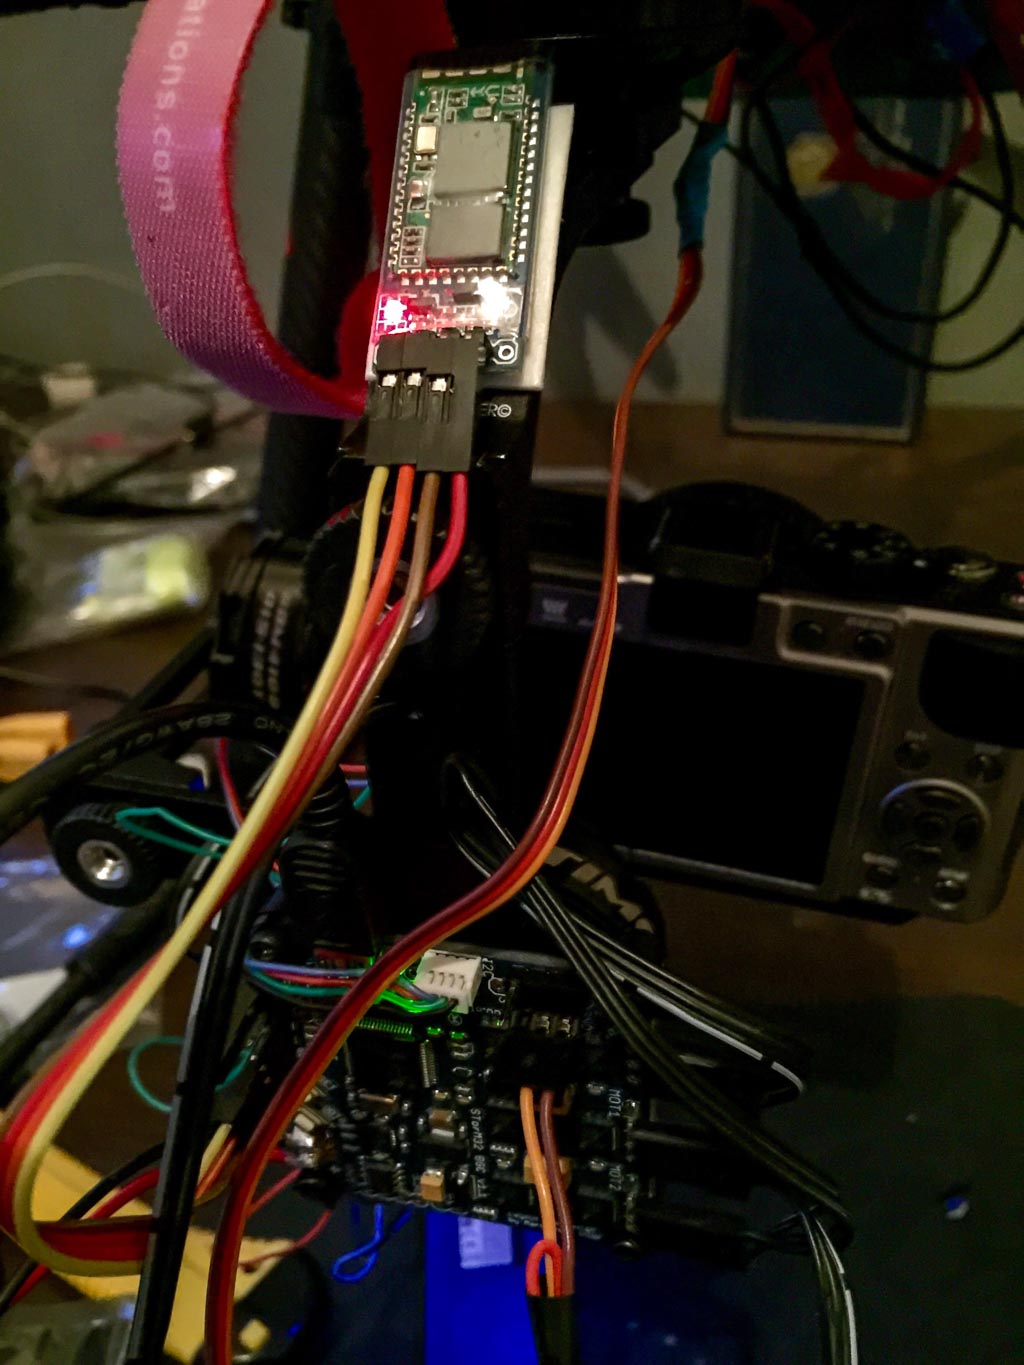
After the HC06 module was connected I could configure it via the STorM32 configuration program, it was basically one button to push and the configuration was ready, now I can conneect to the board via bluetooth to configure it. Except the BT module I have also connected the gimbal to my receiver so I can change pitch via my radio, now I have to get out and test the settings and then I'll tidy up cables.
I've also received a version 1.3 controller and another HC06 module is on the way, that module is without backplane so I will solder it directly to the BGC.
2nd test
Today I had time for a second airborn test with the gimbal, have stiffened it up a little with earplugs and it performed better but it's still seems to be a little soft.
There is still some jello effect, will check motor balance once again and I have some problems with follow yaw it doesn't perform as I want yet, I actually managed to short circuit the battery cables earlier this week so my board could be damaged, will try with my other board next time. It holds the horizon very well at least :-)
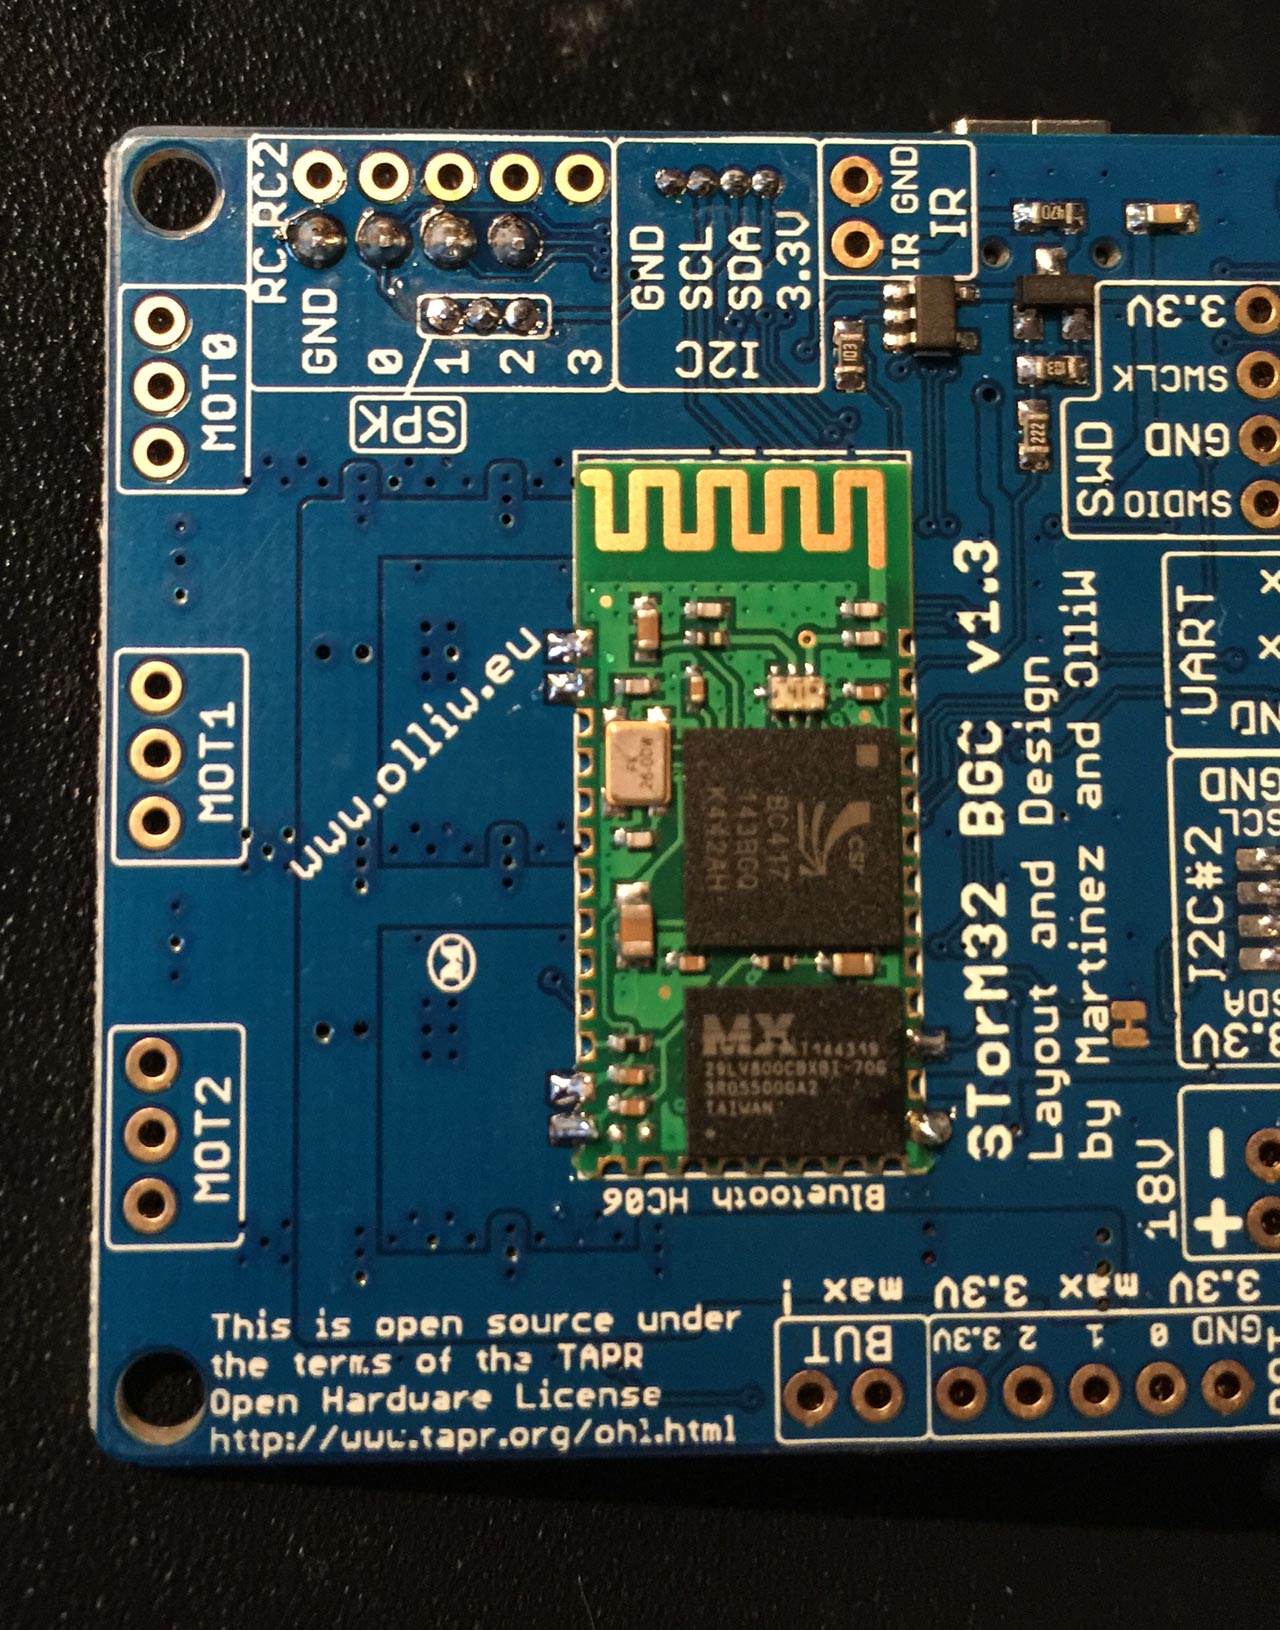
Added bluetooth connection to the V1.3 card
Received more HC06 modules, these were without the backplane so I can solder them directly on the gimbal controller, These modules are really small and I haven't been soldering small things like this before
But the soldering went quite ok.